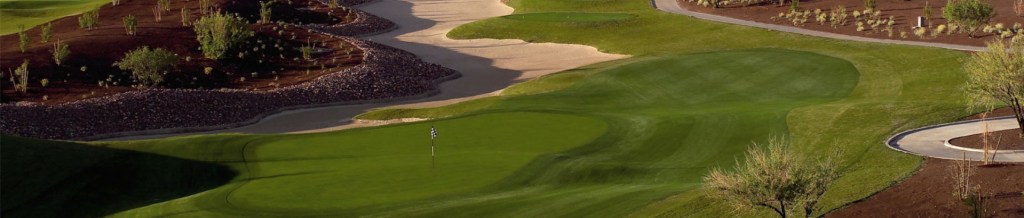
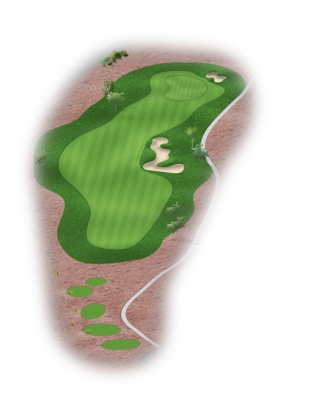
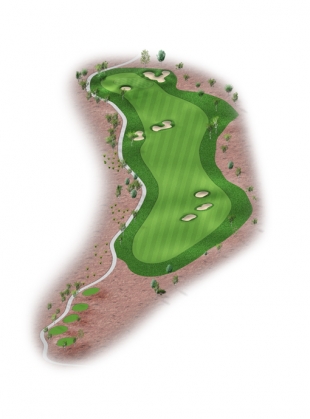
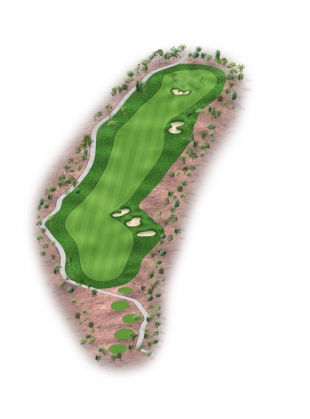
Position your tee ball on this short par-4 just right of two fairway bunkers to set up a short approach shot to an elevated green protected by a greenside bunker on the right.
| Gold | 364 |
| Black | 338 |
| White | 312 |
| Red | 286 |
| Green | 265 |
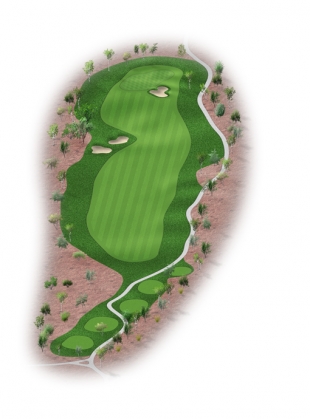
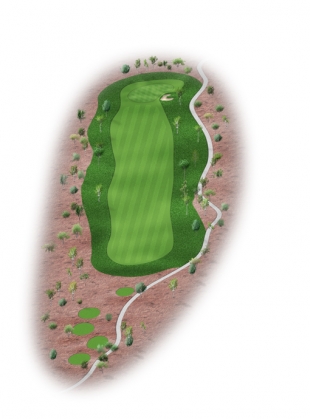
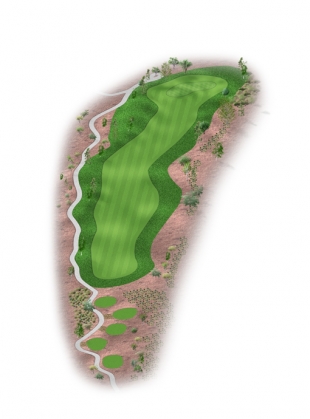
Play this long par-4 tee shot by aiming left of the fairway bunker on the right and prepare for a long iron or fairway wood to a green void of bunkers designed to test your short game.
| Gold | 471 |
| Black | 455 |
| White | 428 |
| Red | 399 |
| Green | 371 |

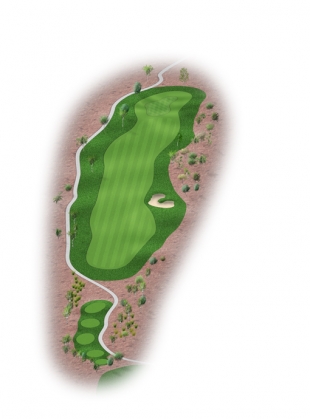
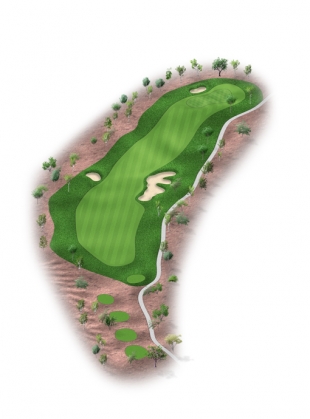
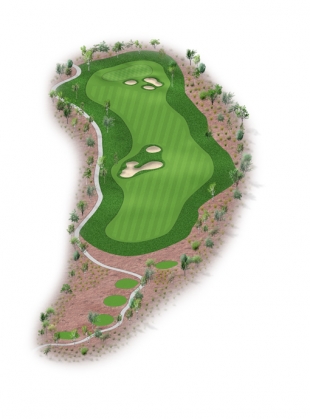
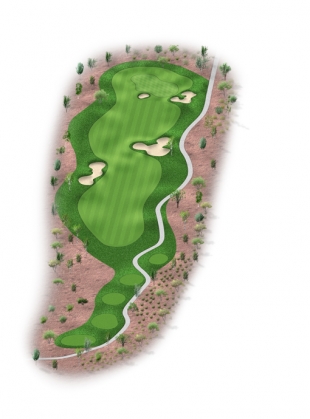
Avoid the fairway bunker on the right side of this long par-5 and play toward the green for a short third shot. The best angle is from the right side of the fairway for the approach shot to avoid the greenside bunker positioned at the front left of this green.
| Gold | 616 |
| Black | 583 |
| White | 545 |
| Red | 474 |
| Green | 443 |
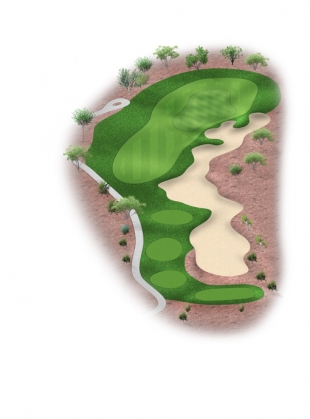
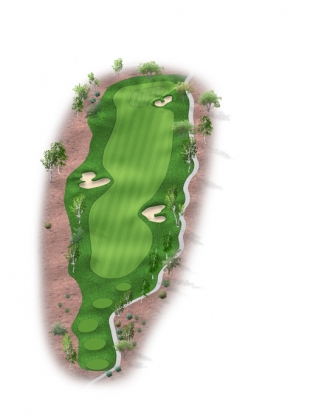
A stout par-3 with a long narrow green. Be cautious of the large greenside bunker to the left and take aim just right of the small bunker in front to find the greens center.
| Gold | 235 |
| Black | 207 |
| White | 194 |
| Red | 165 |
| Green | 141 |
Play left of the large fairway bunker on this small par 4 to set up a short iron approach to a tiered green with a bunker positioned just beyond the putting surface.
| Gold | 354 |
| Black | 333 |
| White | 308 |
| Red | 281 |
| Green | 268 |
A ball positioned just left of center in the fairway on this medium length par-4 will provide the best angle of attack to a green with only a single small greenside bunker to the right.
| Gold | 455 |
| Black | 427 |
| White | 404 |
| Red | 377 |
| Green | 341 |
An enormous bunker from tee to green provides the foundation for this par 3. Select plenty of club for this tee shot keeping in mind that anything short or right will result in a short game skills challenge to make par.
| Gold | 155 |
| Black | 152 |
| White | 131 |
| Red | 121 |
| Green | 96 |
It’s best to place your tee shot just short of the fairway bunker on the left of this dogleg right par 4. That will set up a mid-iron to a green that is protected by one greenside bunker on the left.
| Gold | 428 |
| Black | 399 |
| White | 369 |
| Red | 340 |
| Green | 307 |
This dogleg left opens with a series of bunkers in the middle of a wide fairway. The safe play is to the right side, while the left side of the fairway shortens this par 5. It’s a three-shot hole for most, so take caution before challenging the two bunkers 100 yards out from green.
| Gold | 544 |
| Black | 523 |
| White | 498 |
| Red | 475 |
| Green | 443 |
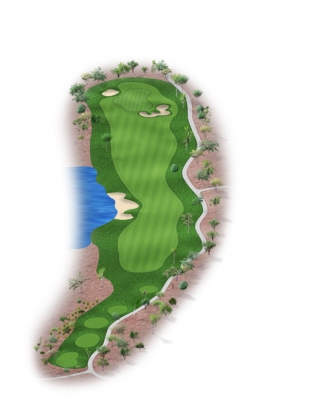
This strong par-4 opens with a dogleg left around a lake and fairway bunker. Safely approach this elevated green with a target line that is left of the greenside bunker in front.
| Gold | 466 |
| Black | 431 |
| White | 399 |
| Red | 374 |
| Green | 336 |
Avoid the fairway bunker you see at the turn point of this dogleg left par 4 and beware of another just beyond, making the carry ominous. A short to mid iron played over three bunkers fronting a narrow green must be precise to find the putting surface.
| Gold | 416 |
| Black | 389 |
| White | 358 |
| Red | 332 |
| Green | 302 |
This signature par 3 plays over a large basin and boulder wall to a generous tri-level putting surface. With bunkers on both sides this green is well guarded and appears small from the tee.
| Gold | 193 |
| Black | 177 |
| White | 156 |
| Red | 135 |
| Green | 114 |
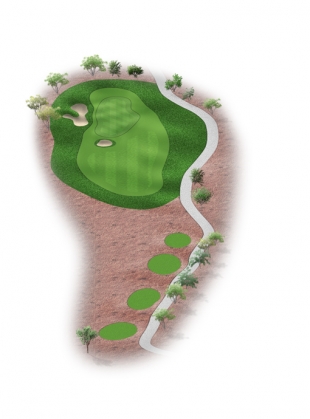
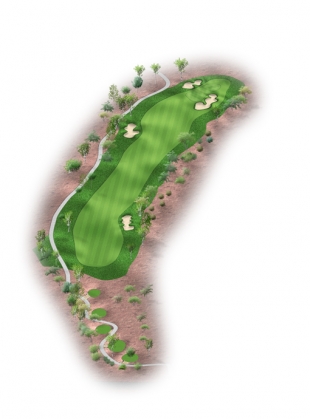
Position your tee ball down the left side of this long 3-shot par-5 dogleg right to avoid the three bunkers at the turn point and beware of one more at the 2nd turn. Distance control is important on the approach over a large bunker fronting the green.
| Gold | 596 |
| Black | 565 |
| White | 532 |
| Red | 499 |
| Green | 468 |
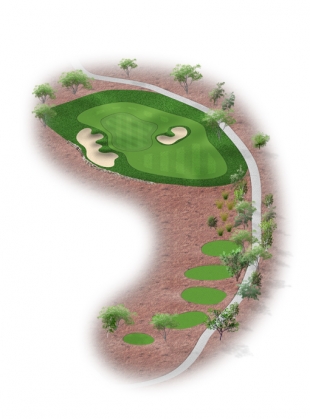
Although framed by large mounds, there are no bunkers to be found on this modest length par-4 that slightly doglegs right. Watch for multiple collection areas surrounding the green.
| Gold | 460 |
| Black | 430 |
| White | 405 |
| Red | 380 |
| Green | 358 |
Short and possibly drivable, this par-4 plays mostly straightaway. Pick your club according to the risk of four well-placed bunkers. This green is elevated and challenging, so be aggressive.
| Gold | 352 |
| Black | 327 |
| White | 296 |
| Red | 270 |
| Green | 245 |
Position your tee ball between the two fairway bunkers on this par-4. Note the greenside bunker on the right and the grass swale to the left that protect this putting surface.
| Gold | 433 |
| Black | 400 |
| White | 370 |
| Red | 334 |
| Green | 245 |
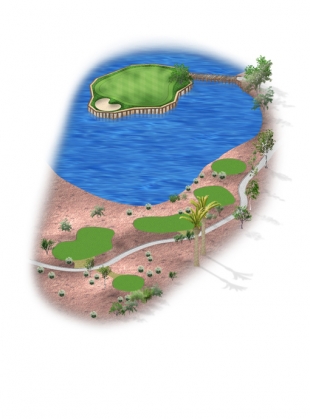
Play a short to mid iron to the picturesque island green. Beware of the wind from side to side. A miss and you are “off the island.”
| Gold | 169 |
| Black | 147 |
| White | 117 |
| Red | 96 |
| Green | 75 |
Long hitters may be presented with an opportunity to get home in two on this par-5. The challenging putting surface on this green will be the final hurdle to a dramatic finish.
| Gold | 564 |
| Black | 537 |
| White | 499 |
| Red | 465 |
| Green | 422 |